Follow My Blog

Follow on Bloglovin

8.14.2020

Hofkissed is Back!!

Well, I've never gone away really... but haven't stayed on in the Blogging world. I thought I'd like to get back to it though and share my creative adventures, at lease once a week. Perhaps you've been keeping up with me on Facebook or Instagram? I also recently got back to posting videos on my YouTube Channel. Either way, I'm changing things up a bit here on my blog and want to share all sorts of DIY's - paper crafting, home decor, thrift flips and more.

One of the many things this pandemic has taught me is to "craft my stash" and be resourceful. I've started a weekly Card Kit DIY (you can find the playlist on my YouTube Channel) and catch me live every Tuesday on my Facebook Page. You can purchase the kits from my store - Hofkissed - and craft along with me. The kits include everything you need to make the projects.

In honour of "crafting my stash" I thought it was time to figure out several ways to use my hoards of ribbon. Can you relate? Below you'll find a few of the projects and a link to the video that'll walk you through it all.

Tassels are just about the easiest thing to make with ribbon and twine and are super trendy right now with a beaded garland!


Do you love to make your own embellishments? Sometimes I just like to play around and see what the end result is. I really love how this one came together.


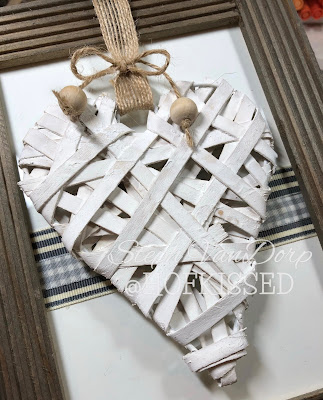
I'm sure you've heard of adding prints or scrapbook paper to frames for a quick and easy decor piece. But what about ribbon?!


This is probably my favourite project from the series. I'm so in love with this rag wreath!!

To see a breakdown of these projects and more, be sure to check out my video... I'll walk you through each one step-by-step.


I hope this was helpful and gets you to use up that ribbon! What other ways can you come up with? I would love to see what you create - tag me on social media @hofkissed

Until next time, stay crafty!

Steph

9.15.2019

Manly Birthday Card... with a Christmas Set

Welcome to another monthly Blog Hop with the Stamping Symphony team. Today we are showing you projects with the Holiday Catalogue. I've used a Christmas stamp set, but created a non Christmas card for you today.


I have been using up many items that have been laying around my studio (some for years!) - die cuts, items from past kits and even pieces from cards at classes. I used some of those items to create this beauty, and you can definitely create something identical with the supply list I've shown below.


There are lots of fabulous layers on this card and not a lot of embellishments. I really like this layered look. There is an embossed panel, fussy cut images and die cut elements, not to forget the faux stitching and colouring.

I always feel it's important to decorate the inside to match the front of the card. It's an extra little bit of happy. Here I stamped the wood image and added a die cut leaf.


The main thing I want to show off here is the fact that I used a Christmas stamp set from the Holiday Catalogue (Still Scenes) and turned the wintery trees into ones that were in full bloom. All it takes is some masking & a little bit of creative colouring. ;)

If you'd like a step-by-step guide to how to create this card, you should check out my video below.


Thanks for hopping along with us this month. Be sure to check out the other fabulous creations and give my fellow stamping friends some love.


1. A La Cards (Leena)
2. Lolly & Sand (Sandy)
3. justBstamping (Barb)
4. Stamping with Jen (Jen)
5. Hofkissed (Steph) << You Are Here


Until next time, stay crafty!
Steph


Product List
Big Shot
Big Shot
[143263]
$150.00

8.15.2019

It's Almost Fall, Y'All... & A Blog Hop!

Welcome to another Blog Hop with Stamping Symphony (always on the 15th of the month!). Today we're showcasing Fall projects. Fall is my FAVOURITE time of year and while I don't want the warm weather to disappear, I can't wait for the fall colours! Which is why I chose to create a project with fall colours... but one that is not necessarily fall themed. Check it out:


I used a somewhat neglected stamp set from my self called Healing Hugs and created layers to the front of the card with stamping, fussy cutting & embossing. I really love how this looks. It adds a lot of interest with little effort.


You know I always love to coordinate the inside to mimic the front... it's an added little bonus for the recipient! A little bit extra happy (and people have told me that it's a nice surprise!). :)


Here's a better view of the front layers. Did you notice the splatter image too? I was able to achieve that with a couple of Blends. 

Now, if you're thinking that I didn't really go into much detail, you're right. BUT, that's because I have a video of the "how to". I'd love for you to check it out below.


Thanks for hopping along with us this month. Be sure to check out the other fabulous creations below.


1. A La Cards (Leena)
2. Lolly & Sand (Sandy)
3. justBstamping (Barb)
4. Stamping with Jen (Jen)
5. Hofkissed (Steph) << You Are Here


Until next time, stay crafty!
Steph

Product List
Big Shot
Big Shot
[143263]
$150.00
Paper Snips Scissors
[103579]
$13.50